The Secret to Cooking the Perfect Steak Every Time
Cooking the perfect steak is both an art and a science. Whether you like it rare, medium-rare, or well-done, achieving the ideal level of doneness requires precision and attention to detail. While seasoning and cooking techniques are critical, one tool stands out as a game-changer in the steak-cooking process: the meat thermometer. With its ability to provide accurate temperature readings, a meat thermometer ensures your steak is cooked just the way you like it, every time.
In this article, we’ll dive into the secrets of cooking the perfect steak, the role of a meat thermometer in achieving precision, and essential tips to elevate your steak game.
Temperature is the Key
Cooking steak isn’t just about flipping it at the right time or relying on visual cues; it’s about hitting the precise internal temperature that matches your desired level of doneness. Here’s why temperature is crucial:
- Consistency: Nailing the best internal temperature of steak is the key to guaranteeing consistent results, helping you replicate the same perfect steak every time.
- Avoiding Overcooking: Overcooking a steak leads to dryness and toughness while undercooking may leave it cold and unappetizing inside.
- Food Safety: For certain cuts, especially thicker ones, ensuring the steak reaches a safe internal temperature is important to eliminate potential bacteria.
Best Tool to Check the Steak Temperature
A meat thermometer is the ultimate tool for precision cooking. Here’s how it can transform your steak-cooking experience:
- Accurate Doneness: By providing a clear reading of the steak’s internal temperature, a meat thermometer eliminates guesswork and ensures you hit the exact level of doneness.
- Ease of Use: Modern meat thermometers are user-friendly, with digital displays that offer instant readings. This makes it easy for cooks of all skill levels to use.
- Real-Time Monitoring: Wireless or smart thermometers allow you to monitor the steak’s progress without hovering over the grill or stove, ensuring a stress-free cooking experience.
- Versatility: A meat thermometer isn’t just for steak; it’s also ideal for other meats like chicken, pork, and lamb, ensuring perfect cooking across various dishes.

Steak Doneness Guide
Here’s a quick reference for internal steak temperatures and what they mean:
- Rare: 120°F–125°F (49°C–52°C) – Cool, red center.
- Medium-Rare: 130°F–135°F (54°C–57°C) – Warm, red center.
- Medium: 140°F–145°F (60°C–63°C) – Warm, pink center.
- Medium-Well: 150°F–155°F (66°C–68°C) – Slightly pink center.
- Well-Done: 160°F+ (71°C+) – No pink, fully cooked.
Use these temperatures as a guide, and remember to allow for carryover cooking, where the temperature rises slightly after removing the steak from the heat.
How to Cook the Perfect Steak: Step-by-Step
1. Choose the Right Cut
The journey to a perfect steak begins with selecting the right cut. Popular options include:
- Ribeye: Known for its marbling and rich flavor.
- Filet Mignon: A tender, lean cut.
- New York Strip: A balance of tenderness and flavor.
- T-Bone or Porterhouse: A hearty cut featuring two types of steak in one.
2. Bring the Steak to Room Temperature
Take the steak out of the fridge 30–60 minutes before cooking. Allowing it to come to room temperature ensures even cooking.
3. Season Generously
Season both sides of the steak with salt, pepper, and any additional spices or rubs. Let it sit for a few minutes to allow the seasoning to penetrate.
4. Preheat Your Cooking Surface
Whether you’re using a cast-iron skillet, grill, or broiler, preheat it to high heat. A hot surface creates a beautiful sear that locks in the steak’s juices.
5. Cook to Your Desired Doneness
- Sear: Start by searing the steak for 2–3 minutes on each side to develop a flavorful crust.
- Finish: Depending on the thickness, finish cooking in the oven or reduce the heat on your grill or stove.
6. Use a Meat Thermometer
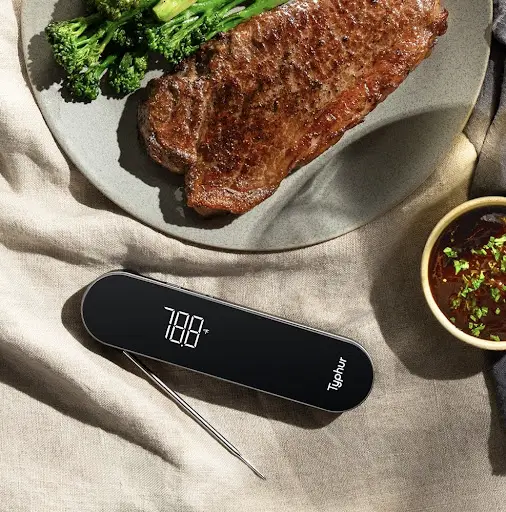
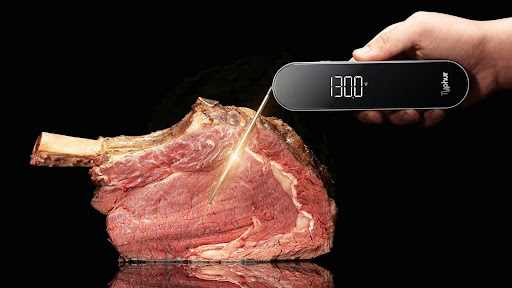
Insert the instant read meat thermometer into the thickest part of the steak, avoiding bones and fat. Monitor the temperature to ensure it reaches your preferred level of doneness.

7. Rest Before Slicing
Remove the steak from the heat when it’s 5°F below your target temperature (carryover cooking will finish the job). Let the steak rest for 5–10 minutes to allow the juices to redistribute.
Tips for Elevating Your Steak Game
Use High-Quality Ingredients: Start with a fresh, high-grade cut of meat for the best flavor and texture.
Experiment with Cooking Methods:
- Reverse Sear: Cook the steak at a low temperature first, then finish with a high-heat sear for a perfectly even cook.
- Sous Vide: Combine precision water bath cooking with a quick sear for unmatched tenderness.
Add Finishing Touches:
- Top your steak with a pat of herb butter for extra richness.
- Serve with a side of garlic or rosemary for aromatic flavor.
Pair with the Right Tools: A high-quality meat thermometer, sturdy tongs, and a good skillet or grill will make all the difference.
Common Steak-Cooking Mistakes to Avoid
- Skipping the Thermometer: Relying on visual cues or timing alone often leads to inconsistent results.
- Overcrowding the Pan: Ensure there’s enough space for the steak to sear properly without steaming.
- Not Resting the Steak: Cutting into the steak too soon lets the juices escape, leading to dryness.
Why a Meat Thermometer is Worth the Investment
A meat thermometer is more than just a tool—it’s your ticket to consistent, professional-quality results. It eliminates the uncertainty in cooking, giving you confidence and control over the process. Whether you’re a seasoned chef or a home cook, a thermometer is an essential addition to your kitchen arsenal.
Conclusion
Cooking the perfect steak every time doesn’t have to be intimidating. With the right techniques, tools like the Typhur meat thermometer, and a little practice, you can achieve restaurant-quality results at home. Whether you’re grilling, searing, or experimenting with sous vide, precise temperature control is the key to unlocking the steak’s full potential.
This simple yet powerful approach will transform your steak-cooking skills, impressing family and friends while elevating your dining experience. So, grab your thermometer, fire up the grill or stove, and enjoy the satisfaction of mastering the perfect steak!
Pizza Stone Dough Roller Slicer Sauce
We exclusively bring you lists of some gadgets related to food, drinks, beverages for your home, kitchen, picnic, parties and more. Below are highly reviewed Pizza Stone Dough Roller Slicer Sauce on sale from Amazon store. ENJOY 🙂[amazon box="B001SAQDYS,B019S3W8AO,B00473ULA0,B000HK2DNA,B06X9QWJVV,B086P7GP35,1639730192" template="horizontal"]