How To Put Kayak On Roof rack By Yourself
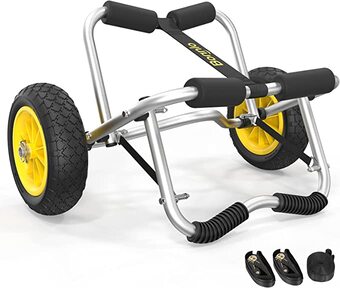
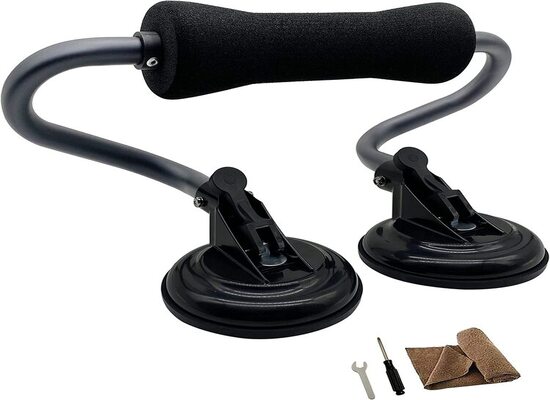
Before we understand how to put kayak on roof rack by yourself, there are a few other things we need to learn. So those things are which roof rack to use if your car doesn’t have one, which Rope Tie Down Ratchet Straps Bow and Stern Ratcheting Tie Downs Rope Hanger to buy for your canoe or kayak. You will also definitely need Hood Loops and Kayak Tie Down Anchor Straps. Even if your car has roof rack pre-installed one thing everyone will need is the Tie Down Straps as you will never want to use cheap ropes due to safety reasons. Two other things my experience tells me that you are going to need if you do not know how to put kayak on roof rack by yourself are Kayak Roller, Kayak Load Assist for SUV Car Roof Lift with Suction Cups, and Kayak Cart Dolly Kayak Wheels Detachable Canoe Cart with Solid Tires.
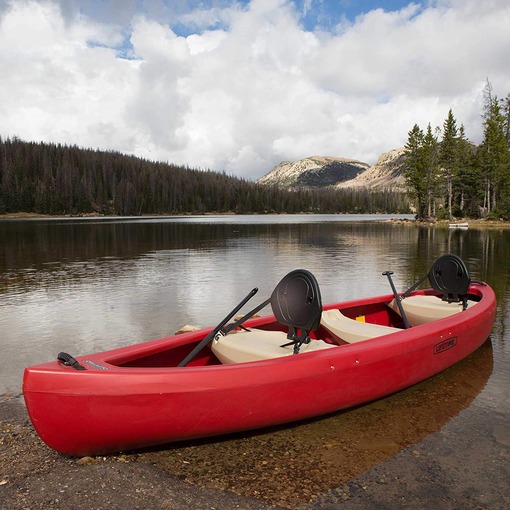
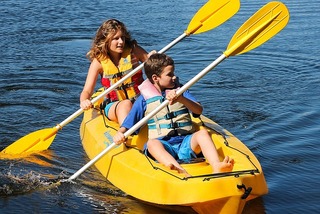
Travelling is fun but kayaking, canoeing, boating is even more fun for me!
For all above mentioned needed kayak gadgets and to learn how to put kayak on roof rack by yourself, please continue reading. Transporting a kayak can be challenging, especially if you don’t have a proper roof rack system installed on your vehicle. Incorrectly securing the kayak can damage your boat, or vehicle, or even result in a potential accident. This comprehensive guide will explore different roof rack systems, how to safely load and secure your kayak, and tips for safe transportation. Let’s see how to load kayak on roof rack!
Types of Roof Racks
As mentioned above. to know how to put kayak on roof rack by yourself, you will need to know the types of roof racks. There are various types of roof racks available, each designed to accommodate different types of kayaks and vehicles. Here are some popular options:
J-Bar Racks
J-bar racks, also known as cradle racks or J-hooks, are one of the most common types of kayak roof racks. They hold the kayak vertically, allowing you to fit multiple boats on your roof. These racks are usually affordable and easy to install, with most models fitting a range of crossbar shapes.
Saddle Racks
Saddle racks are designed to support the kayak horizontally on its hull, using padded cradles that conform to the shape of the boat. They provide excellent stability and are suitable for long trips or heavier kayaks. However, they may require more space on the roof, limiting the number of kayaks you can transport.
Stackers
Stacker racks allow you to carry multiple kayaks on their sides, stacked one on top of the other. They are suitable for transporting several boats simultaneously and can be adjusted to accommodate different kayak widths. However, they may not be as stable as other rack types and can be more challenging to load and unload.
Lift-Assist Racks
Lift-assist racks, such as the Thule Hullavator or Rhino-Rack Nautic Kayak Lifter, make it easier to load and unload your kayak by using a mechanical system to lift the boat onto the roof. They are ideal for individuals with limited strength or mobility but can be more expensive than other rack options.
Choosing the Right Roof Rack for Your Vehicle
Before purchasing a roof rack, consider the following factors to ensure it’s compatible with your vehicle and meets your needs:
- Vehicle compatibility: Check if the rack is designed to fit your specific vehicle’s make and model. Some roof racks require horizontal crossbars, while others can be mounted directly to the vehicle’s roof.
- Kayak size and weight: Ensure the rack can accommodate the dimensions and weight of your kayak. Most racks have a weight limit, so check the manufacturer’s specifications.
- Ease of installation and removal: Some roof racks are easier to install and remove than others. Consider how often you plan to use the rack and whether you need a permanent or temporary solution.
- Additional accessories: Look for racks that come with tie-down straps, padding, and other accessories to protect your kayak and vehicle during transportation.
Preparing Your Vehicle and Kayak
Before you read how to put kayak on roof rack by yourself and try to load kayak on roof rack , take the following steps to prepare your vehicle and kayak:
- Clean your vehicle’s roof and crossbars: Ensure the roof and crossbars are free of dirt and debris to prevent scratches or damage to your kayak and vehicle.
- Inspect the roof rack: Check for any loose or damaged parts and tighten any bolts or screws as needed.
- Install the roof rack: If you haven’t already, install the roof rack according to the manufacturer’s instructions.
- Prepare your kayak: Remove any loose items from the kayak and secure any hatches or compartments. If your kayak has a drain plug, make sure it’s tightly closed.
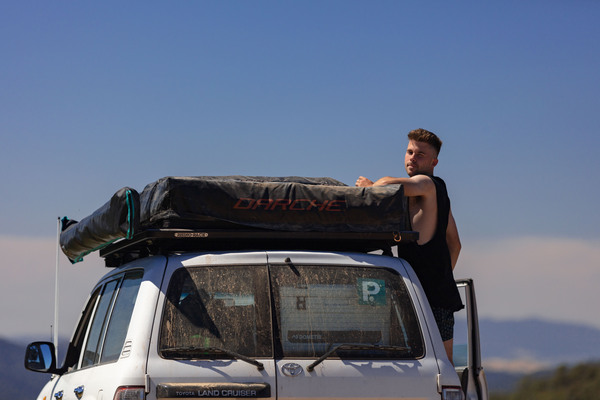
How To Load Kayak On Roof Rack By Yourself
Follow these steps to safely load your kayak onto the roof rack:
- Position the kayak: Stand next to your vehicle and place the kayak on the ground parallel to it. Make sure the cockpit faces up if using a J-bar or saddle rack, and sideways if using a stacker rack.
- Lift the kayak: With the help of a friend or using a lift-assist system, lift the kayak onto the roof rack. If lifting manually, squat down and grab the kayak’s edge closest to you. Stand up while lifting the kayak onto your shoulder, then carefully place it onto the rack.
- Adjust the position: Once the kayak is on the roof rack, adjust its position to ensure it’s centered and aligned with the rack’s supports.
Securing Your Kayak
Properly securing your kayak is crucial for safe transportation. Follow these tips to ensure your kayak is firmly fastened to the roof rack:
- Use appropriate straps: Use a cam buckle or ratchet straps designed for kayak transportation. Avoid using bungee cords, as they can stretch and cause the kayak to become loose.
- Loop straps through the rack: Pass the straps through the rack supports, not just the kayak. This provides additional security and prevents the kayak from sliding off the rack.
- Tighten the straps: Tighten the straps evenly to keep the kayak stable and secure. Check for any slack and tighten as needed. Avoid overtightening, as this can damage your kayak or vehicle.
- Secure loose strap ends: Tie down or tuck in any loose strap ends to prevent them from flapping or vibrating during transportation.
Bow and Stern Lines
Adding bow and stern lines provides extra security and prevents the kayak from shifting forward or backward during sudden stops or impacts. Keep in mind that these lines should be taut but not overly tight, as excessive tension can damage your kayak.
- Attach the bow line: Secure one end of the line to the front handle of your kayak and the other end to a suitable anchor point on your vehicle, such as a tow hook, hood loop strap, or trunk anchor strap.
- Attach the stern line: Repeat the process for the stern line, attaching it to the rear handle of your kayak and a suitable anchor point on your vehicle.
Test Drive and Inspections
Before hitting the road, take a test drive to ensure your kayak is securely fastened and doesn’t cause any issues while driving:
- Perform a shake test: Give your kayak a firm shake to check for any movement or looseness. If needed, tighten the straps or adjust the position of the kayak on the rack.
- Take a short test drive: Drive around your neighborhood or a nearby parking lot at increasing speeds to see how the kayak responds to wind and motion.
- Inspect the straps and lines: After the test drive, recheck the straps and lines for any looseness or signs of wear.
Safe Driving Tips
With your kayak securely fastened, follow these safe driving tips to ensure a smooth and stress-free journey:
- Drive at a moderate speed: Avoid excessive speeds or sudden maneuvers that may cause the kayak to shift or become unstable.
- Check the weather forecast: Be cautious when driving in high winds, as this can affect the stability of your kayak on the roof rack.
- Inspect your kayak regularly: Stop every 30-50 miles to inspect the straps, lines, and rack for any signs of looseness or damage. Make any necessary adjustments before continuing your journey.
Unloading Your Kayak
When you reach your destination, follow these steps to safely unload your kayak from the roof rack:
- Park your vehicle on level ground: Ensure your vehicle is parked on a flat, stable surface for easier and safer unloading.
- Loosen the straps and lines: Release the tension on the straps and lines by carefully loosening the buckles or ratchets.
- Remove the kayak: With the help of a friend or using a lift-assist system, carefully lift the kayak off the roof rack and lower it to the ground.
Maintenance and Care
Proper maintenance and care of your roof rack and kayak will ensure their longevity and safety during transportation:
- Clean your roof rack and kayak regularly: Remove any dirt or debris from the rack and kayak to prevent scratches or damage.
- Inspect your roof rack for damage: Regularly check for loose or damaged components and tighten or replace them as necessary.
- Store your roof rack and straps when not in use: Keep your roof rack and straps in a cool, dry place to prevent rust or damage from exposure to the elements.
YouTube Video on DIY Kayak load assist using kayak roller
YouTube Video on How to use a canoe trolley (or kayak cart dolly)
YouTube Video on How to Load a Large Kayak Onto a Roof Rack
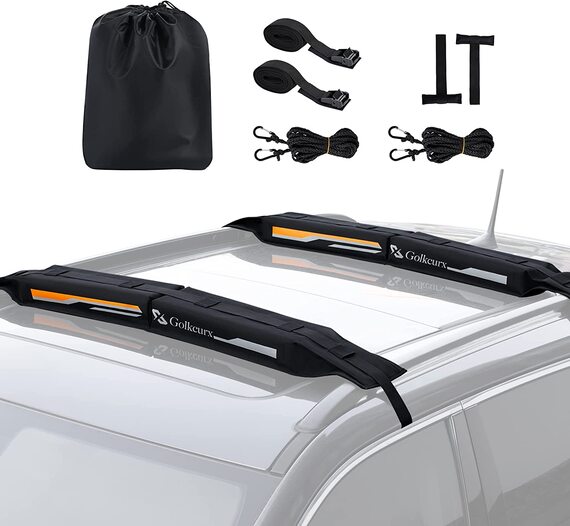
YouTube Video on Universal SOFT Roof Top Rack Soft Cross Bars Installation Guide
YouTube Video on Universal Rooftop Roof Rack Crossbar Installation Guide
YouTube Video on How to Strap a Canoe to Your Vehicle
By following the above comprehensive guide on how to put kayak on roof rack by yourself, you’ll be well-prepared to safely transport your kayak on a roof rack, ensuring the safety of your boat, vehicle, and fellow travelers. Happy paddling! Click here for Table of Contents – How to put kayak on roof rack by yourself.
How to put kayak on roof rack by yourself Gadgets on Sale | Amazon
Pizza Stone Dough Roller Slicer Sauce
We exclusively bring you lists of some gadgets related to food, drinks, beverages for your home, kitchen, picnic, parties and more. Below are highly reviewed Pizza Stone Dough Roller Slicer Sauce on sale from Amazon store. ENJOY 🙂Pastorelli Pizza Sauce Italian Chef, Original, 8-Ounce (Pack of 12)
Kitchy Pizza Cutter Wheel with Protective Blade Cover, Ergonomic Pizza Slicer
Weisenberger Pizza Crust Mix, 6.5 Ounce - Premade Pizza Dough Flour for Homemade Pizza, Breadsticks, Flatbread, or Calzones
Norpro Wood Pastry/Pizza Roller 4in/10cm
Time-Saver Pizza Dough Roller Docker - Dough Blistering Killer - Buy One Get Three (Pizza Cutter and Pastry Scraper) - Gift Package
Cuzi Gourmet 3-Piece Pizza Stone Set - 15x12" Thermal Shock Resistant Cordierite Pizza Stone, 15x12" Natural Wood Pizza Peel & Pizza Cutter - Pizza Stone for Grill and Oven
Mantova Grand’Aroma Pizza Flavored Extra Virgin Olive Oil, made in Italy, cold-pressed, 100% natural, heart-healthy cooking oil perfect for pizza dough, pasta, garlic bread, or sauces

Are Funyuns Vegan or Not? – Detailed Answer (2023)
Best Vegan Passport Wallets in 2023 | Top Reviewed